Remodeling a kitchen is one of the most rewarding – and most misunderstood – projects a homeowner can take on. Do it in the right sequence, and the process feels controlled, predictable, and even exciting. Do it out of order, and you end up paying twice, tearing out fresh work, or living without a stove for far longer than you planned.
At Mars Brothers Kitchen & Bath, our Tustin-based team has guided hundreds of Orange County homeowners through kitchen renovations in cities from Irvine to Newport Beach to Dana Point. Over that time, one lesson has come up again and again: the order of the work matters just as much as the work itself. That’s why we put together this practical guide to the 8 Steps to Remodeling a Kitchen – the exact sequence we follow on real job sites, explained in plain language so you know what’s coming before the first cabinet ever comes off the wall.
If you’ve been searching for a clear, honest breakdown of the Steps to Remodeling a Kitchen without the fluff, you’re in the right place. Let’s walk through it, step by step.
Why the Order of Your Kitchen Remodel Matters
Before we get into the actual kitchen remodel process, it helps to understand why sequence is everything. A kitchen is the most trade-heavy room in your home. Plumbers, electricians, cabinet installers, tile setters, and painters all have to work in a specific relay – each one handing off to the next at exactly the right moment.
Skip ahead, and problems stack up fast:
- Order countertops before cabinets are set and the measurements won’t match, forcing a costly re-cut.
- Install flooring before demolition is finished and you’ll scratch or crack brand-new material.
- Skip permits and you risk failed inspections, fines, and headaches when you eventually sell the home.
Following the correct kitchen remodel process protects your budget, your timeline, and your sanity. It’s also the single biggest difference between a renovation that finishes on schedule and one that drags on for months. With that in mind, here’s the sequence we recommend.
Read more: Kitchen Cabinet Colors ideas
The 8 Steps to Remodeling a Kitchen at a Glance
For readers who want the quick version, here are the eight steps in the order we perform them:
- Set your budget and define your goals
- Design your layout and choose materials
- Hire a licensed kitchen remodeling contractor
- Pull the right permits before work begins
- Demolition and tear-out
- Rough-in: plumbing, electrical, and framing
- Install cabinets, countertops, and flooring
- Finishing touches and the final walkthrough
Now let’s break down each of the Steps to Remodeling a Kitchen in detail.
Step 1 – Set Your Budget and Define Your Goals
Every successful kitchen renovation starts with honest numbers. Before you fall in love with a Pinterest board full of waterfall islands, decide what you can realistically spend and what you actually want to achieve.
How Much Does a Kitchen Remodel Cost in Orange County?
Pricing here in OC runs higher than the national average because of strong demand for skilled trades, coastal-market realities, and California’s strict building codes. Based on current 2026 figures across Orange County, here’s what homeowners are typically spending:
- Budget refresh: $25,000–$55,000 (new countertops, cabinet refacing, paint, hardware, and backsplash while keeping the same layout)
- Mid-range remodel: $60,000–$110,000 (new cabinets, quartz or granite countertops, updated appliances, flooring, and lighting)
- High-end / luxury: $120,000–$175,000+ (custom cabinetry, premium finishes, and layout changes)
Most OC homeowners land somewhere between $65,000 and $95,000 for a full mid-range kitchen. Cabinets alone usually eat up 30–40% of the total, so that’s where your money goes fastest.
Build In a Contingency
One of the smartest moves in the entire order of a kitchen remodel is setting aside a 10–15% contingency fund. Older Orange County homes love to hide surprises behind their walls – outdated wiring, water damage, or non-code plumbing. A cushion keeps a surprise from becoming a crisis.
Mars Brothers Pro Tip: Write down your top three “must-haves” and top three “nice-to-haves” before you talk to anyone. When the budget gets tight later, this list makes trade-off decisions painless instead of emotional.
Step 2 – Design Your Layout and Choose Materials
With a budget in place, the next of our Steps to Remodeling a Kitchen is design. This is the creative, fun phase – but it’s also where careful planning saves the most money down the line.
Nail Down the Kitchen Layout First
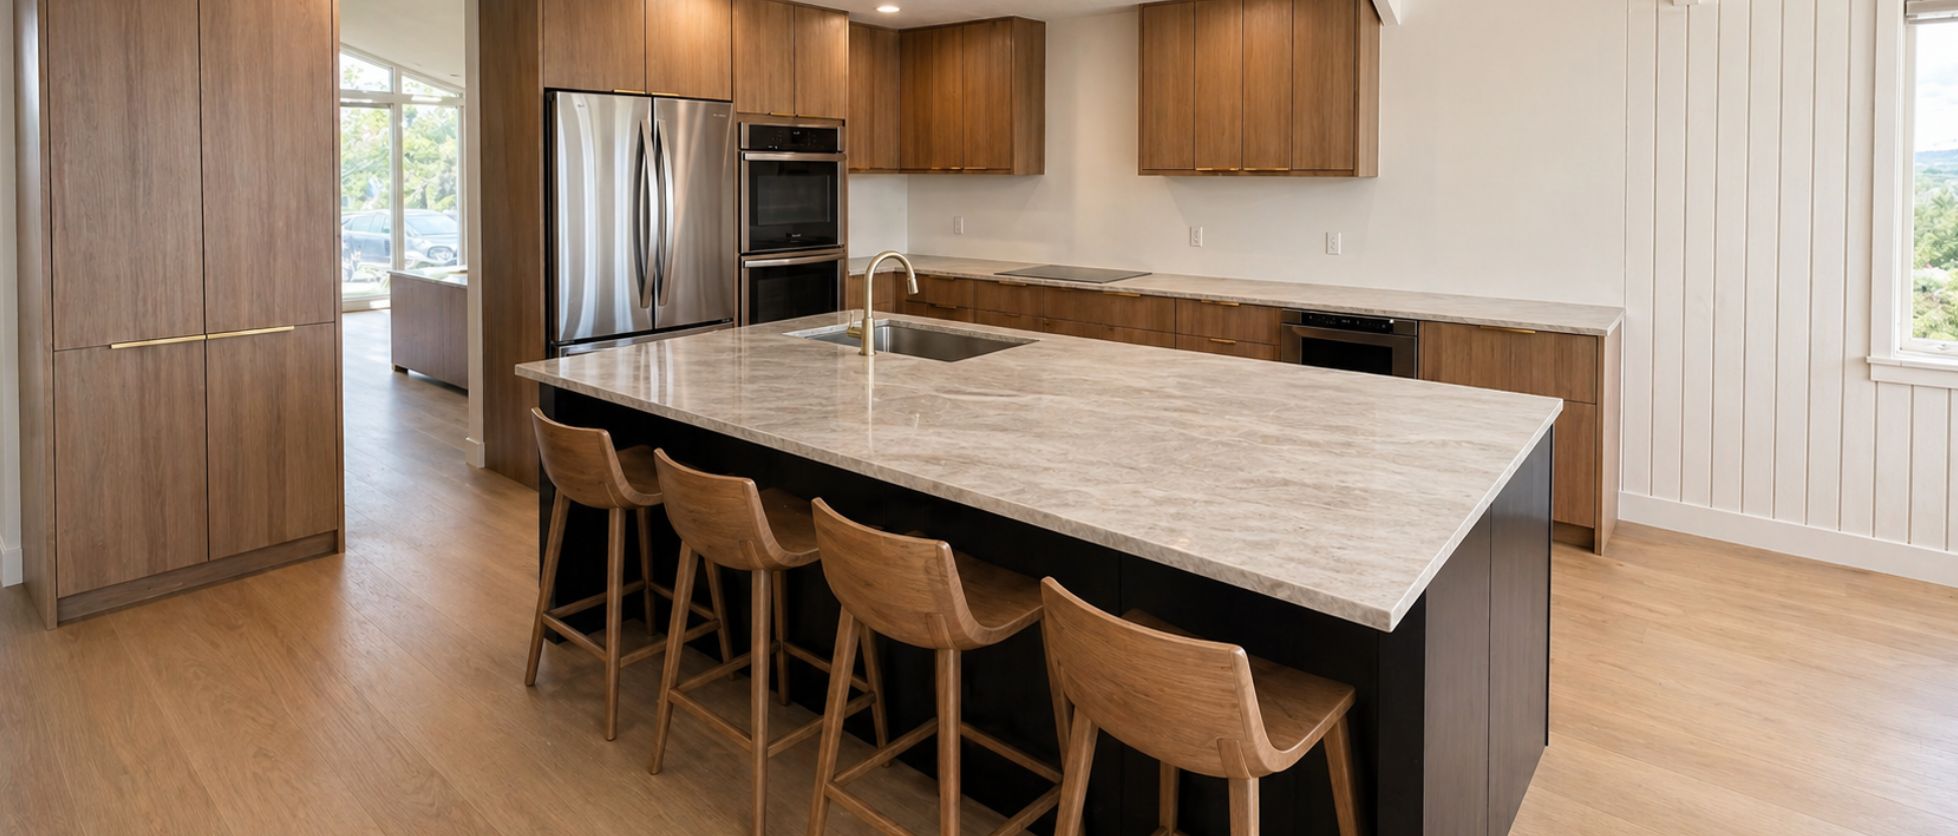
Your layout determines everything else, so decide early whether you’re keeping the existing footprint or moving things around. Relocating a sink, gas line, or range means additional plumbing and electrical work, which raises both cost and timeline. Popular, efficient layouts include:
- The work triangle (sink, stove, and refrigerator positioned for easy movement)
- Galley kitchens for narrow spaces
- L-shaped and U-shaped designs for open-concept homes
- Island or peninsula additions for extra prep space and seating
Select Materials and Finishes Early
Choosing your cabinets, countertops, flooring, backsplash, and appliances before construction starts prevents delays. Some materials – especially custom cabinets and certain stone slabs – have lead times of six to ten weeks. Ordering late is one of the most common reasons a kitchen renovation stalls.
When you reach the appliance stage, it pays to think long-term. Choosing ENERGY STAR certified appliances can meaningfully lower your utility bills – an ENERGY STAR refrigerator uses roughly 9% less energy than a standard model, and certified dishwashers use about 12% less energy and 30% less water. In California, these choices also help you meet Title 24 energy requirements during inspection.
Mars Brothers Pro Tip: Order a physical sample of every finish – cabinet door, countertop chip, tile, and flooring plank – and lay them together in your actual kitchen light. Colors that look perfect on a screen often read completely differently under your own fixtures.
Readmore: kitchen cabinet refacing vs painting
Step 3 – Hire a Licensed Kitchen Remodeling Contractor
You’ve got a plan and a budget. Now comes one of the most important Steps to Remodeling a Kitchen: choosing the right team to build it. The contractor you hire has more influence over your outcome than any single material choice.
Always Verify the License
In California, any home improvement project where labor and materials total $1,000 or more legally requires a licensed contractor. That threshold, raised from $500 effective January 1, 2025, covers virtually every real kitchen remodel.
Before you sign anything, confirm your contractor’s credentials directly through the California Contractors State License Board (CSLB). Their free license lookup tool shows whether the license is active, bonded, and insured. Look for:
- An active license in the correct classification (a “B” general contractor or “B-2” residential remodeling license for full kitchens)
- A current surety bond (typically $25,000)
- Valid workers’ compensation insurance
- A clean disciplinary record
Watch for Red Flags
A trustworthy contractor for your kitchen remodeling project will happily provide references and put everything in writing. Be cautious of:
- A bid dramatically lower than every other quote
- Pressure to pay large sums in cash up front
- No written contract (California requires one for any job over $500)
- Requests for a deposit above the legal cap – in California, deposits are limited to $1,000 or 10% of the contract price, whichever is less
Mars Brothers Pro Tip: Ask each contractor to walk you through their sequence for the Steps to Remodeling a Kitchen. A pro who can clearly explain the order of operations – and who schedules inspections at the right points – is far more likely to finish on time and on budget.
Step 4 – Pull the Right Permits Before Work Begins
Permits aren’t optional, and they’re not just red tape. In Orange County, every electrical, plumbing, gas, and structural change in a kitchen requires a permit from your local building department. This is one of the Steps to Remodeling a Kitchen that homeowners are tempted to skip – and it’s one of the costliest mistakes you can make.
Why Permits Protect You
- Unpermitted work can derail a future sale. Title companies flag it, and buyers’ lenders sometimes won’t fund a deal with open permit issues.
- Inspections catch dangerous mistakes in wiring, gas, and plumbing before they’re sealed behind drywall.
- Permitted work carries documented value that appraisers and future buyers recognize.
Permit fees for kitchen scopes in Orange County commonly range from $200 to $1,500, depending on your city and the complexity of the job. Simple cosmetic projects with no structural or utility changes may qualify for a fast over-the-counter permit, while remodels that move plumbing or electrical typically require a plan check that can take several weeks.
Let Your Contractor Handle It
While California allows homeowners to pull their own permits for a primary residence, most people are better served letting their licensed contractor manage the process. Your contractor knows the local code, prepares the required Title 24 energy compliance documentation, and schedules the rough-in, insulation, and final inspections at the correct stages.
Mars Brothers Pro Tip: Never let anyone talk you into skipping permits “to save time.” The few weeks you save now can cost you tens of thousands later when an unpermitted kitchen shows up during escrow.
Step 5 – Demolition and Tear-Out
Now the visible transformation begins. Demolition is often the most satisfying part of a kitchen renovation – there’s nothing quite like watching the old, tired space disappear. But it needs to be done carefully and safely.
What Happens During Demolition
- Old cabinets, countertops, and appliances are removed
- Existing flooring and backsplash are torn out
- Walls may be opened up if the layout is changing
- Debris is hauled away, ideally with as much material recycled as possible
A Critical Safety Note for Older Homes
If your Orange County home was built before 1978, it may contain lead-based paint – and disturbing it during a kitchen renovation creates hazardous dust. Under the federal EPA Renovation, Repair, and Painting (RRP) Rule, any contractor paid to disturb painted surfaces in a pre-1978 home must be EPA lead-safe certified and follow specific containment practices. This isn’t optional, and it’s one more reason to hire a properly certified professional rather than cutting corners.
Mars Brothers Pro Tip: Set up a small temporary kitchen before demolition day – a folding table, microwave, coffee maker, and the fridge relocated to the garage. You’ll be living without a full kitchen for several weeks, and a little prep makes it far more bearable.
Step 6 – Rough-In: Plumbing, Electrical, and Framing
With the space cleared, we reach the structural heart of the kitchen remodel process. Rough-in is the behind-the-walls work that nobody sees but everyone depends on. Get this stage right, and everything that follows falls neatly into place.
What Rough-In Includes
- Framing: Building or modifying walls, and reinforcing spots where heavy cabinets or a range hood will hang
- Plumbing: Running or relocating supply and drain lines for the sink, dishwasher, and any pot filler
- Electrical: Adding circuits, outlets, under-cabinet lighting, and dedicated lines for appliances
- HVAC and ventilation: Ducting the range hood and adjusting airflow if needed
The First Round of Inspections
This is where those permits pay off. Before any drywall goes up, a city inspector must sign off on the rough electrical, plumbing, gas, and framing work. If something isn’t up to code, it gets corrected now – while it’s still easy and cheap to fix. Insulation is inspected next if exterior walls were opened.
Once inspections pass, drywall goes up, gets taped and textured, and the walls are primed and painted. The room finally starts to feel like a kitchen again.
Mars Brothers Pro Tip: Add more electrical outlets and lighting circuits than you think you need during rough-in. It’s inexpensive to run wire while the walls are open and expensive to add later. Modern kitchens are packed with small appliances – plan for them now.
Step 7 – Install Cabinets, Countertops, and Flooring
Here’s where your kitchen renovation truly comes to life. This is the most transformative of all the Steps to Remodeling a Kitchen, and it follows a precise internal order of its own.
The Correct Installation Sequence
Getting these sub-steps in the right order prevents damage and costly re-work:
- Flooring (in many cases) goes down first or alongside cabinets, depending on material
- Cabinets are set, leveled, and secured to the wall studs
- Countertops are template-measured after cabinets are installed, then fabricated and set – usually one to two weeks later for stone
- Backsplash tile goes up once countertops are in place
- Sink, faucet, and appliances are connected
- Lighting fixtures and hardware finish the look
Notice that countertops can’t be finalized until cabinets are physically installed – this is exactly why sequence matters so much in the kitchen remodel process. Templating too early guarantees a bad fit.
Choosing Countertops
Quartz remains the most popular choice across Orange County, typically running $50–$90 per square foot installed. It’s durable, low-maintenance, and comes in nearly limitless patterns. Granite, marble, and butcher block each have their fans, but quartz hits the sweet spot for most families.
Mars Brothers Pro Tip: Be present the day cabinets are installed. It’s the best moment to confirm that everything aligns with your plan – drawer placement, appliance openings, and clearances – before countertops lock the layout in permanently.
Step 8 – Finishing Touches and the Final Walkthrough
You’ve made it to the last of the Steps to Remodeling a Kitchen. The big elements are in; now it’s about the details that make the space feel finished and functional.
The Final Details
- Install cabinet hardware, knobs, and pulls
- Connect and test all plumbing fixtures and appliances
- Complete final paint touch-ups
- Add trim, molding, and any open shelving
- Deep-clean the entire space
The Final Inspection and Walkthrough
Before the project is officially complete, your city conducts a final inspection to confirm every permitted element meets code. Once it passes, you and your contractor do a detailed walkthrough together, creating a “punch list” of any small items to address – a cabinet door that needs adjusting, a bit of caulk to touch up, a drawer to realign.
A reputable contractor won’t consider the job done until that punch list is fully resolved and you’re genuinely happy with the result. That’s the finish line of every kitchen remodeling project done right.
Mars Brothers Pro Tip: Don’t rush the walkthrough. Open every drawer, run every faucet, test every outlet, and turn on every light. It’s far easier to fix small issues while the crew is still on-site than to call them back weeks later.

How Long Does Remodeling a Kitchen Take?
One of the most common questions we hear is about timeline. For a typical mid-range Orange County kitchen, plan on 8 to 14 weeks from demolition to final walkthrough – though the full journey, including design and material ordering, often stretches to four or five months when you count the planning phase.
Several factors influence how long the kitchen remodel process takes:
- Scope: Cosmetic refreshes finish faster than full gut renovations
- Layout changes: Moving plumbing and gas adds time
- Material lead times: Custom cabinets and specialty stone can add weeks
- Permit and inspection scheduling: Plan checks vary by city
- Unexpected repairs: Hidden issues in older homes
The best defense against delays is thorough planning up front – which brings us right back to Step 1.
Frequently Asked Questions About Remodeling a Kitchen
What is the correct order for the steps to remodeling a kitchen?
The correct order is: (1) set your budget and goals, (2) design the layout and choose materials, (3) hire a licensed contractor, (4) pull permits, (5) demolition, (6) rough-in plumbing and electrical, (7) install cabinets, countertops, and flooring, and (8) finishing touches with a final inspection. Following this sequence prevents costly re-work and keeps your kitchen renovation on schedule.
How much does it cost to remodel a kitchen in Orange County?
In 2026, a budget refresh typically runs $25,000–$55,000, a mid-range remodel runs $60,000–$110,000, and high-end or luxury kitchens start around $120,000 and can exceed $175,000. Most Orange County homeowners spend between $65,000 and $95,000 for a full mid-range kitchen. Cabinets usually account for 30–40% of the total budget.
Do I need a permit to remodel my kitchen in California?
Yes. Any electrical, plumbing, gas, or structural change in a California kitchen requires a permit from your local building department. Permit fees in Orange County generally range from $200 to $1,500. Skipping permits can lead to failed inspections, fines, and serious complications when you sell your home. Your licensed contractor can pull and manage permits for you.
Should I install flooring or cabinets first?
It depends on your flooring material, but in many kitchen remodels the flooring is installed first or in coordination with the cabinets. What’s non-negotiable is that countertops are always templated after cabinets are installed and leveled, because the counters must match the exact cabinet layout. This is one of the clearest examples of why the order of the steps to remodeling a kitchen matters.
How long does a kitchen remodel take from start to finish?
On-site construction for a typical Orange County kitchen takes about 8 to 14 weeks. When you include design, material selection, and ordering, the complete process often spans four to five months. Layout changes, custom material lead times, and permit scheduling are the biggest factors that affect how long remodeling a kitchen takes.
Ready to Start Your Kitchen Remodel?
Understanding the Steps to Remodeling a Kitchen is the first move toward a renovation you’ll love for years. The second is partnering with a team that follows that sequence with care, communicates clearly, and treats your home like their own.
At Mars Brothers Kitchen & Bath, we’ve been transforming kitchens throughout Tustin, Irvine, Newport Beach, Dana Point, Laguna Niguel, and the greater Orange County area – one carefully sequenced step at a time. Whether you’re dreaming of a simple refresh or a full custom build, we’d love to walk you through the process from budget to final walkthrough.
Visit marsbrokitchenbath.com to schedule your free consultation. Let’s build the kitchen you’ve always wanted – in exactly the right order.